Saturday, May 12, 2012

Custom Birthday Banner

Hey all,

Its been banner city here!! Recently we got to make a banner for an adorable 1 year old: Eli!


 Here is a close up of the banner before we strung it together . . .

What we did was make a blue & white themed banner. It was made with blocks & cupcakes die-cuts. The letters were all strung together with black ribbons. "HAPPY" is connected to the ends of "BIRTHDAY" so that it would help crave the curve and then the bottoms of the "H" and "Y" block was connected with brads to secure and keep the curve no matter how to pin it up.

Then when we used brads to connect "ELI" to each other and to the "T" & "H" on the banner.

Hope you like it and don't forget to visit our Etsy store . . . we have customized banners up for sale or many different things that you can buy separately to make your own customized banner!

Saturday, May 5, 2012

Survivor Welcome Banner

Hey all,

Sorry it has been a while since we posted. Lots have been going on and before things pick up again, we wanted to share with all of you a banner that we had the honor of making. The American Cancer Society recently had a breakfast event for cancer survivors at our local Playhouse. We asked if we can make the welcome banner to contribute, they said yes . . . and this is what it looks like.

 We used our charmed letters on top to have hooks to hang the banner and on the sides from the "S" and "&" there is a ribbon to pull the banner straight across

We strung "survivors" together and hung each letter of "supporters" beneath each circle. We used alternating colors for the circles to give it a little pop.

Hope you like it!

Sunday, April 15, 2012

Making Strides Against Breast Cancer

Hello All!!

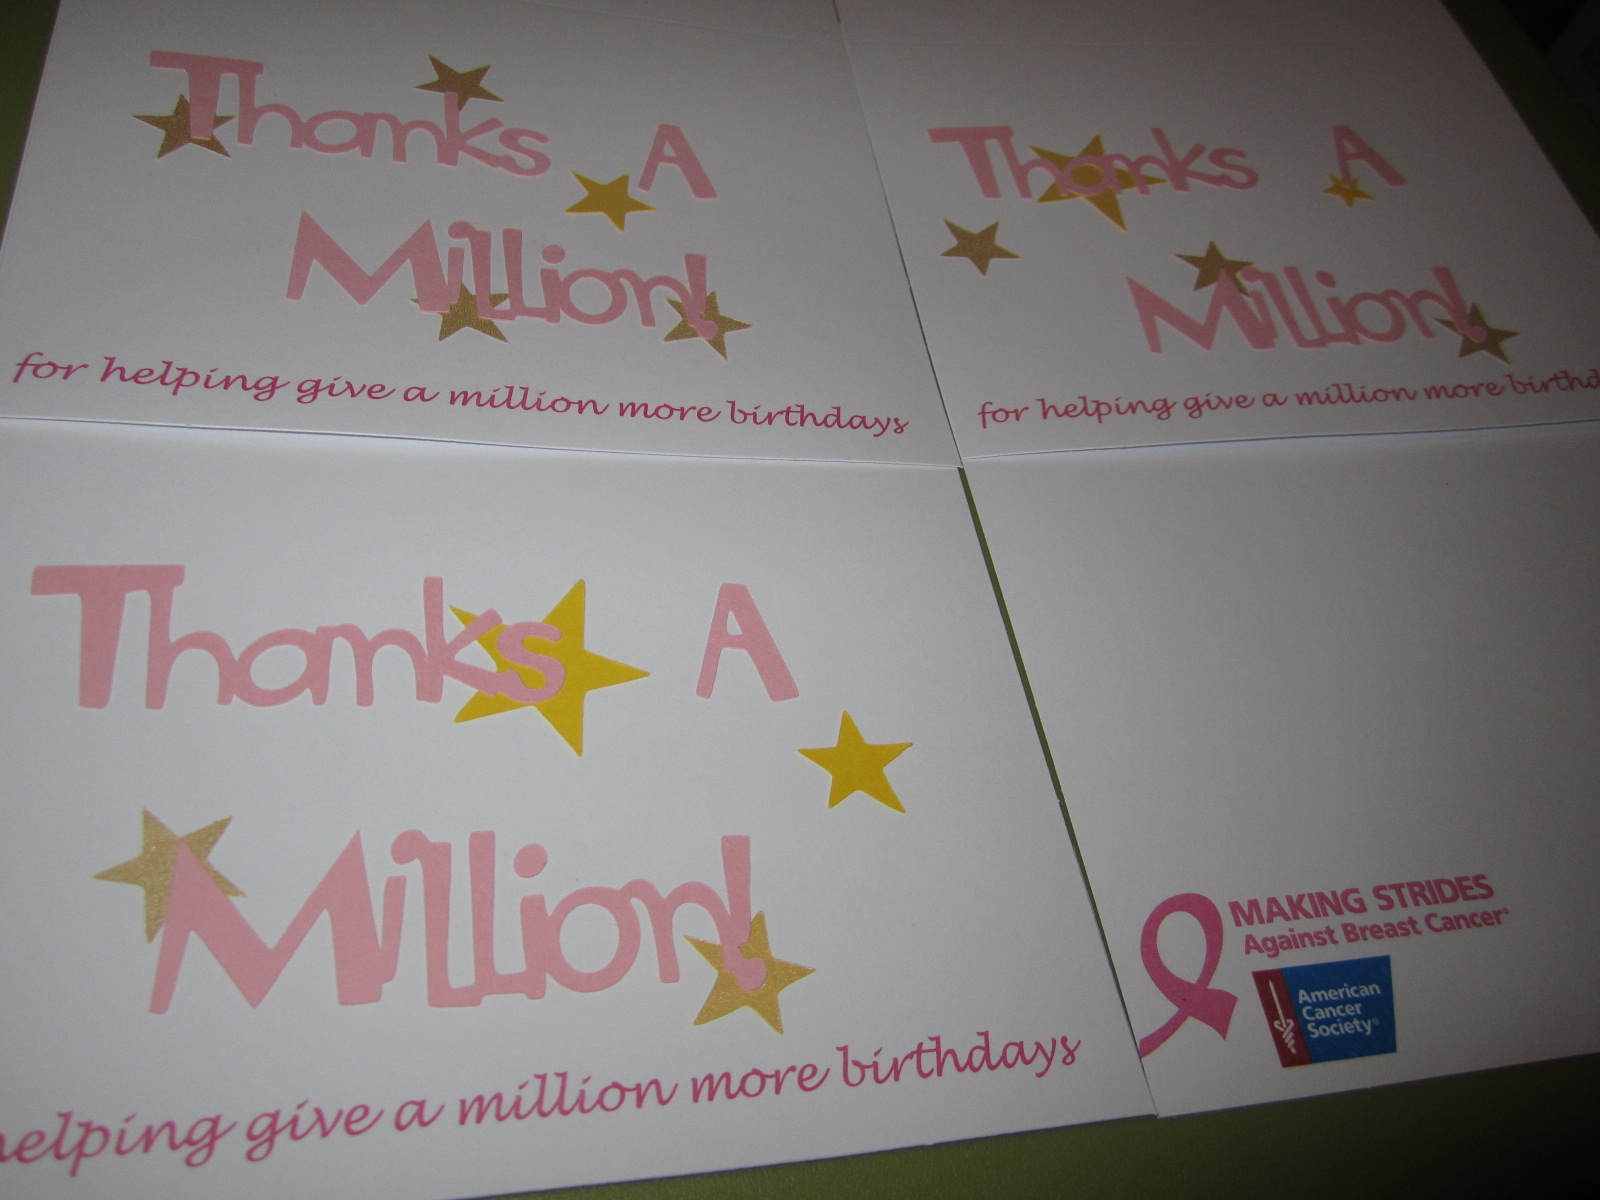
So we recently got the wonderful opportunity to make Thank You cards for a great organization, American Cancer Society. One of our friend works for the Making Strides Against Breast Cancer campaign and I (baby sister) asked if he would like Thank You cards for his volunteers or contributors, I always wanted to help out in some way, but I can't be physically there a lot of the time due to work constraints. However! I can make things . . . so that is what I have been doing. First off these cards . . .
What I did was cut an embellishment "Thanks a Million" & yellow/ gold stars and printed "for helping give a million more birthdays. All the cards are different in some way. I wanted to keep every card similar, meaning, the embellishments are all the same. But what differs from card to card are the placements/ size of the stars and where the embellishment are placed.

On the inside I left the card blank for him to write something and I printed their logo on the bottom left corner.

Hope you like it! Tell us what you think & don't forget to visit our Etsy Store!!

Wednesday, April 4, 2012

Congratulation Post Card

Hey All!

Recently a friend of mine (Baby Sister) from high school welcomed a beautiful baby girl Amaya Holly to the world.

About 2 weeks before she was due, I sent over a gift because I didn't make it to the baby shower. Of course I made a card for them. I included a pink Congratulation post card. I kept it very simple and clean. Here is what it looked like:

I choose pink because that was the majority color on their registry, so I assumed that their nursery will be, aside from the obvious that the baby is a girl.

I also used the royal letter tag on the envelope. I tied a pink ribbon at the top.

Hope you like it! Visit our Etsy Store for more items that you can use for various occasions!

Wednesday, March 14, 2012

Days Until " I Do . . ."

Hey there all bloggers!

Recently our cousin got engaged and we saw this really cute item and knew that we can make it ourselves! Except in the original it was made of wood and we decided to use foam to be more cost effective & easier to work with than wood.

This is the outcome:


We used white glitter foam with a purple foam strip. For the letters we used glitter glue. You can use puffy paint, which I think will look better, but we were going for the glitter look and glitter glue seems to do the trick best. We also think that cardstock letters will work great, but we didn't have the proper glue. We also facebook stalked her so that we can print out these wonderful pictures of the happy couple.

You can see the purple string on the top corner, that was our main string that we used so that she can hang the poster to her wall, or anything that she wants to.


After we wrote with the glitter glue, we made sure we gave it at least 1 day to dry! We wanted to make sure that it was fully dried before we used a purple pen to define the letters.


This is our wonderful square charm that we cut from 0-9. This worked so great with a simple fabric string that we can puncture with the colored tab to the foam. We did these numbers so that she can keep herself organized and to know how many days she has left because weddings can be so time consuming and its easy to get caught up with 1 project when there is a whole wedding to plan. Our cousin works full time & goes to school part time, so organization is a MUST! The numbers are easy to handle and change and to pin on and off . . . all of the above!

We hope that you like this and hope that you are inspired to make something great for someone. Check out our Etsy Store to see if there is anything that you can use for your next project! Or if there is anything that you see here and our past post! We can definitely help to make something great happen!


Sunday, March 4, 2012

Burlap Banner

Look at how one of our recent customer used the Western Alphabet!  This is a super cute burlap banner that she made for a friend's baby shower.


Photo courtesy of: jamiemellis from etsy.com

Sunday, February 19, 2012

Simple Thank You Tags

Hey all,

As you know, I (Baby Sister) is a big supporter of an organization called Poly North. Last week they had their first annual Love Run to try to get folks to come out and run for a great cause. All proceeds went to directly to Poly North.

Both of us picked up on a couponing habit and noticed that there were awesome coupons for valentine day candy, so what I did was bought enough to fill a bowl or so and runners can get one after they finished the run, I also created a very simple tag for the candy. Here is what the tag looked like:


I kept the tags very simple, I just used a standard rectangle with a simple thank you note. I slit some lines so that I can put a ribbon through to tape. I didn't want to tie because if I tied the tags, it can slip off easily, and if I tied too tight, I can ruin the candy. Tape seems to do the trick wonderfully.

Please visit us at our Etsy Store to see if there is anything that we can do for you! Check it often because we have plenty of things that we are creating constantly!