
Sunday, September 14, 2014

Saturday, February 1, 2014
Owl Invites
Typically we get requests for Jungle/Safari baby shower crafts. This time we received a request for an Owl theme. The new parents are expecting their first bundle of joy and will not know the gender until it's time!

Will it be a hheee or shhheeee?
Sunday, December 23, 2012
D.I.Y Christmas
Hey everyone!!
Christmas is upon us, and we should have posted this blog sooner, since we think that a lot of these ideas are so much fun . . . and affordable! Affordability during the holidays is so important . . . we come from a big family, so when we do anything, we have to budget right to make sure that we get the most bang for our buck... and to make sure that we get everything that everyone want . . . this also allows us to be creative.
Here are some things and activities that we did this year . . .


Christmas is upon us, and we should have posted this blog sooner, since we think that a lot of these ideas are so much fun . . . and affordable! Affordability during the holidays is so important . . . we come from a big family, so when we do anything, we have to budget right to make sure that we get the most bang for our buck... and to make sure that we get everything that everyone want . . . this also allows us to be creative.
Here are some things and activities that we did this year . . .

We put up our annual (fake) Christmas Tree . . . with typical ornaments and ornaments name made with card-stock paper. We used our stencils and Cricut machine to cut everyone's names and just backed it onto another card-stock to make the name pop! We also decorated our names with random stickers that we found at the dollar section at Target & Michaels . . . This is our third year and the names on the tree keeps growing as more family members and friends join us for our annual Christmas gathering. It's a nice way to keep adding to our "family tree" and a nice change from writing names on an ornament.


We also made our own wrapping paper this year. We have been on a reusable kick, so reusing brown packing paper was
perfect in saving money and it gave us a blank canvas to play with in
creating something new and fun for our Christmas gifts. We decided to emboss them with different colors and holiday stamps that we had. Turned out cute and yay for going green!

We also emboss bags to give plain bags a little personality to them . . . if you have an embosser, you can also emboss bags for any occasions!

We had these tags as a Christmas Special at our Etsy store . . . we LOVE these tags because it is so cute! We used them for all of our gifts this year because it was so easy to tie and attached. What's best about the tags is that you can customize the size of the tag and decorate the tags in any way that you want . . .
Visit our Etsy Store and see what we have that can help you with your next project! From tags to wrapping paper . . . to cards . . . we will try to help in any way that we can.
Wednesday, November 28, 2012
Mr. & Mrs. Vu
The middle of this month, we were honored to be part of our cousin's wedding. After a year of planning and anticipations, the day came and we couldn't have asked for a better outcome. Even with the rain! Everything we envision was executed beautifully! I'm sure my cousins wouldn't ask for a better day. =) The saying "save the best for last," is true because their wedding sums up our wedding season with a bang! We and along with all the guests had so much fun!
We would like to share a few photos of our items that added a little touch to the simply beautiful wedding.
Look at how nicely the banner hangs in front of their sweetheart table! We cut out hearts and strung them using the romance letters.
We also made photobooth props: mustaches, glasses, and bows that was a hit for the guests to pose with.

We would like to share a few photos of our items that added a little touch to the simply beautiful wedding.
 | |||||||||||||
| Photo Credit: Steven Nguyen |
We also made photobooth props: mustaches, glasses, and bows that was a hit for the guests to pose with.


Photo Credits: Blankbooth

"We love M&R" sign was made for our friend's wedding the previous month and somehow found its way with S&N's props. =P
Be sure to check out our shop for your next project!
Sunday, November 4, 2012
Pacman Halloween Costume
Hey all . . . as you know Halloween has come and gone! We wanted to share the costume that we made this year. This year . . . we went with a giant Pacman!
(Sorry in advance, the photos were taken on a phone, so it is a bit darker than the camera we usually use)
First we started with foam boards, and taped it together to get a large circle . . . We had a yard stick, so we just made the circles a yard tall/ wide . . . the easiest way that we found to do it was to make a cross and made a makeshift compass by getting a string and holding it down in the middle and getting a pen to connect the cross.
We used an exacto-knife to cut the circles because it cuts a lot cleaner than using a scissor . . . and using an exacto-knife gives your more control of your cuts . . . just remember slow & steady!! after u cut 1, you can trace the 2nd and just cut, no need to make a brand new circle . . .
 For the mouth, you can cut it to be as big as you want, what we did was measured 4inches from the center and drew a line, and made the triangle mouth opening from that line.
Then after that was all cut and done, we got yellow fabric (you can always use paint, but we choose fabric because painting requires you to make sure it is evenly painted so that the colors are consistent.)


(Sorry in advance, the photos were taken on a phone, so it is a bit darker than the camera we usually use)
First we started with foam boards, and taped it together to get a large circle . . . We had a yard stick, so we just made the circles a yard tall/ wide . . . the easiest way that we found to do it was to make a cross and made a makeshift compass by getting a string and holding it down in the middle and getting a pen to connect the cross.
We used an exacto-knife to cut the circles because it cuts a lot cleaner than using a scissor . . . and using an exacto-knife gives your more control of your cuts . . . just remember slow & steady!! after u cut 1, you can trace the 2nd and just cut, no need to make a brand new circle . . .

Then after that was all cut and done, we got yellow fabric (you can always use paint, but we choose fabric because painting requires you to make sure it is evenly painted so that the colors are consistent.)

Before putting on the yellow fabric we did cut the circles were we wanted the arms to stick out, we just took something circular and traced it then used out trusty exact-knife. Its better to go small, then work from there . . . What happened with ours was that when put on, it was better to cut an oval than a huge circle. Since our arm circle was small to begin with, we just fixed it from there. It can be cut for the person's comfort.
We also used spray glue to put on the fabric because it was easy to stick on the foam boards and for the edges (cut and stretch over the circle edge). It'll be wise to have something that is a straight edge to help get rid of the bubbles that the fabric makes when lying over the board.

We did 2 layers because our cloth was a tad bit thin (it was 30% off!) but we had more than enough for 2 layers for both sides of the body and to cover the backside.

We had extra foam lying around, so we used it to make the structure or the connecting pieces of both sides of the body. We taped it from the inside. Also, we randomly found a foam board that could go over the head (after cutting a hole) to be extra support at the shoulder level.
In hindsight, it would be smart to get VELCRO! And use that to connect the 2 pieces. So using the extra fabric, spray it on the connecting pieces and then velcro it on.

This is just how it looks when it is standing upright to make sure that everything is stable and won't fall apart. Or to see what needs fixing.

Trying it on to see if everything fits comfortably, This way we can still fix the sizing issues

This is what ours looked like after we covered the structural pieces with the back yellow fabric. Everything was sprayed glue on. But like we said before, in hindsight, velcro is the way to go! The spray glue is cool for getting the fabric on, but for structure velco is the best option . . .
At this point, if you wanted to use a black fabric to cover the bottom part of the mouth so that it can be legit, you can, but since this was for work contest, we left the mouth open so that the arms can be taken out of the arm holes to type.

This is the final fitting with the yellow shirt and black bottom to complete the look. Don't forget to glue on your eyes!

In this battle of Pacman VS. Robot, Pacman won . . . a $50 giftcard to Michaels for many more crafting projects to come!!
We don't sell the costume on our Etsy Store, but feel free to visit our Etsy Store anyways! We have lots of great things for the upcoming holidays.
Saturday, October 20, 2012
Mother's Day Crown
This is a long over due post and we are trying to catch up with our blog on letters that customer use for their project. This is a very cute idea for future teacher to use! Mrs. Haley of Huntington Beach, CA used our big block letters for students to decorate a crown for their mother or guardian. This project turned out very nice especially with the shimmery paper that she requested.


Thank you Mrs. Haley for sharing these pictures with us.
Monday, October 8, 2012


Saturday, September 22, 2012
FB Fan Page
We are revamping our inventory as well as our site. Now we have created a FB page. Come like us!
SimpleeNou
SimpleeNou
Wednesday, July 25, 2012


Wednesday, June 6, 2012


Saturday, May 12, 2012
Custom Birthday Banner
Hey all,
Its been banner city here!! Recently we got to make a banner for an adorable 1 year old: Eli!


What we did was make a blue & white themed banner. It was made with blocks & cupcakes die-cuts. The letters were all strung together with black ribbons. "HAPPY" is connected to the ends of "BIRTHDAY" so that it would help crave the curve and then the bottoms of the "H" and "Y" block was connected with brads to secure and keep the curve no matter how to pin it up.
Then when we used brads to connect "ELI" to each other and to the "T" & "H" on the banner.
Hope you like it and don't forget to visit our Etsy store . . . we have customized banners up for sale or many different things that you can buy separately to make your own customized banner!
Its been banner city here!! Recently we got to make a banner for an adorable 1 year old: Eli!


Here is a close up of the banner before we strung it together . . .
What we did was make a blue & white themed banner. It was made with blocks & cupcakes die-cuts. The letters were all strung together with black ribbons. "HAPPY" is connected to the ends of "BIRTHDAY" so that it would help crave the curve and then the bottoms of the "H" and "Y" block was connected with brads to secure and keep the curve no matter how to pin it up.
Then when we used brads to connect "ELI" to each other and to the "T" & "H" on the banner.
Hope you like it and don't forget to visit our Etsy store . . . we have customized banners up for sale or many different things that you can buy separately to make your own customized banner!
Saturday, May 5, 2012
Survivor Welcome Banner
Hey all,
Sorry it has been a while since we posted. Lots have been going on and before things pick up again, we wanted to share with all of you a banner that we had the honor of making. The American Cancer Society recently had a breakfast event for cancer survivors at our local Playhouse. We asked if we can make the welcome banner to contribute, they said yes . . . and this is what it looks like.
 We used our charmed letters on top to have hooks to hang the banner and on the sides from the "S" and "&" there is a ribbon to pull the banner straight across
 We strung "survivors" together and hung each letter of "supporters" beneath each circle. We used alternating colors for the circles to give it a little pop.
Hope you like it!
Sorry it has been a while since we posted. Lots have been going on and before things pick up again, we wanted to share with all of you a banner that we had the honor of making. The American Cancer Society recently had a breakfast event for cancer survivors at our local Playhouse. We asked if we can make the welcome banner to contribute, they said yes . . . and this is what it looks like.


Hope you like it!
Sunday, April 15, 2012
Making Strides Against Breast Cancer
Hello All!!
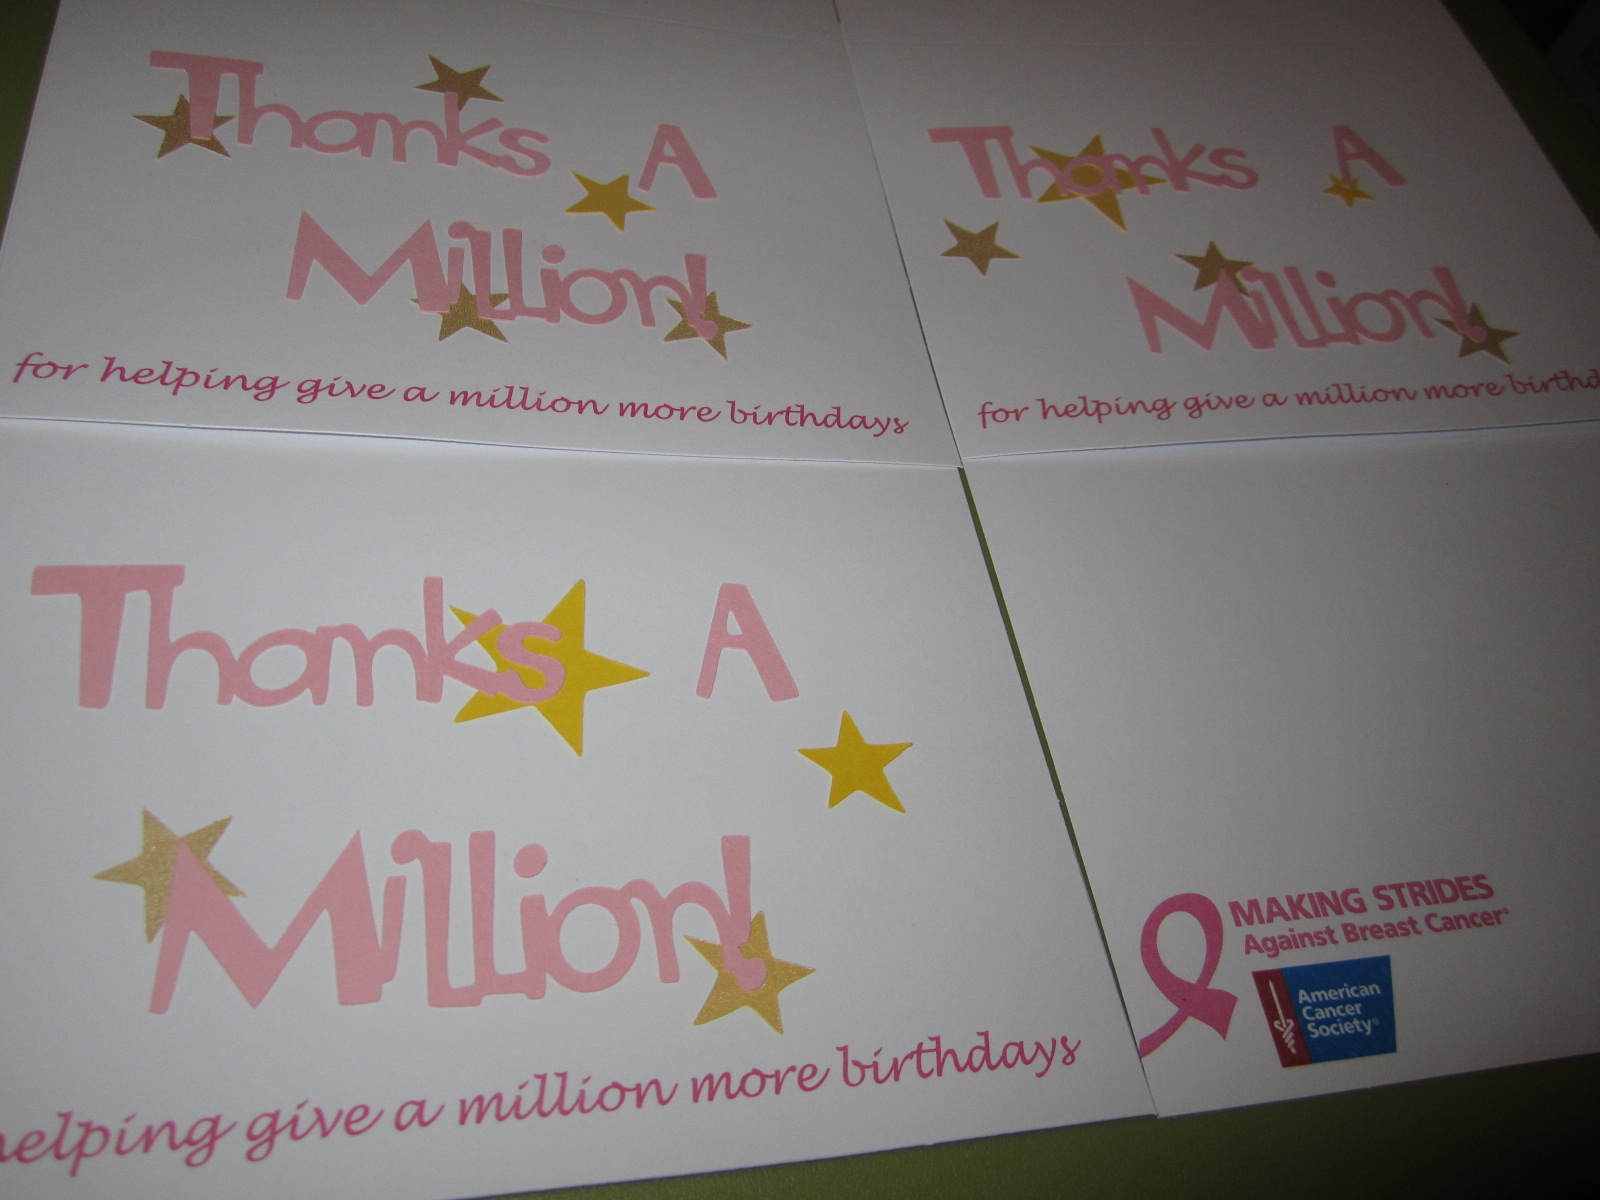
So we recently got the wonderful opportunity to make Thank You cards for a great organization, American Cancer Society. One of our friend works for the Making Strides Against Breast Cancer campaign and I (baby sister) asked if he would like Thank You cards for his volunteers or contributors, I always wanted to help out in some way, but I can't be physically there a lot of the time due to work constraints. However! I can make things . . . so that is what I have been doing. First off these cards . . .
 What I did was cut an embellishment "Thanks a Million" & yellow/ gold stars and printed "for helping give a million more birthdays. All the cards are different in some way. I wanted to keep every card similar, meaning, the embellishments are all the same. But what differs from card to card are the placements/ size of the stars and where the embellishment are placed.
On the inside I left the card blank for him to write something and I printed their logo on the bottom left corner.
Hope you like it! Tell us what you think & don't forget to visit our Etsy Store!!
So we recently got the wonderful opportunity to make Thank You cards for a great organization, American Cancer Society. One of our friend works for the Making Strides Against Breast Cancer campaign and I (baby sister) asked if he would like Thank You cards for his volunteers or contributors, I always wanted to help out in some way, but I can't be physically there a lot of the time due to work constraints. However! I can make things . . . so that is what I have been doing. First off these cards . . .
On the inside I left the card blank for him to write something and I printed their logo on the bottom left corner.
Hope you like it! Tell us what you think & don't forget to visit our Etsy Store!!
Wednesday, April 4, 2012
Congratulation Post Card
Hey All!
Recently a friend of mine (Baby Sister) from high school welcomed a beautiful baby girl Amaya Holly to the world.
About 2 weeks before she was due, I sent over a gift because I didn't make it to the baby shower. Of course I made a card for them. I included a pink Congratulation post card. I kept it very simple and clean. Here is what it looked like:
 I choose pink because that was the majority color on their registry, so I assumed that their nursery will be, aside from the obvious that the baby is a girl.
I also used the royal letter tag on the envelope. I tied a pink ribbon at the top.
Hope you like it! Visit our Etsy Store for more items that you can use for various occasions!
Recently a friend of mine (Baby Sister) from high school welcomed a beautiful baby girl Amaya Holly to the world.
About 2 weeks before she was due, I sent over a gift because I didn't make it to the baby shower. Of course I made a card for them. I included a pink Congratulation post card. I kept it very simple and clean. Here is what it looked like:

I also used the royal letter tag on the envelope. I tied a pink ribbon at the top.
Hope you like it! Visit our Etsy Store for more items that you can use for various occasions!
Wednesday, March 14, 2012
Days Until " I Do . . ."
Hey there all bloggers!
Recently our cousin got engaged and we saw this really cute item and knew that we can make it ourselves! Except in the original it was made of wood and we decided to use foam to be more cost effective & easier to work with than wood.
This is the outcome:

We used white glitter foam with a purple foam strip. For the letters we used glitter glue. You can use puffy paint, which I think will look better, but we were going for the glitter look and glitter glue seems to do the trick best. We also think that cardstock letters will work great, but we didn't have the proper glue. We also facebook stalked her so that we can print out these wonderful pictures of the happy couple.
You can see the purple string on the top corner, that was our main string that we used so that she can hang the poster to her wall, or anything that she wants to.

After we wrote with the glitter glue, we made sure we gave it at least 1 day to dry! We wanted to make sure that it was fully dried before we used a purple pen to define the letters.

This is our wonderful square charm that we cut from 0-9. This worked so great with a simple fabric string that we can puncture with the colored tab to the foam. We did these numbers so that she can keep herself organized and to know how many days she has left because weddings can be so time consuming and its easy to get caught up with 1 project when there is a whole wedding to plan. Our cousin works full time & goes to school part time, so organization is a MUST! The numbers are easy to handle and change and to pin on and off . . . all of the above!
We hope that you like this and hope that you are inspired to make something great for someone. Check out our Etsy Store to see if there is anything that you can use for your next project! Or if there is anything that you see here and our past post! We can definitely help to make something great happen!
Recently our cousin got engaged and we saw this really cute item and knew that we can make it ourselves! Except in the original it was made of wood and we decided to use foam to be more cost effective & easier to work with than wood.
This is the outcome:

We used white glitter foam with a purple foam strip. For the letters we used glitter glue. You can use puffy paint, which I think will look better, but we were going for the glitter look and glitter glue seems to do the trick best. We also think that cardstock letters will work great, but we didn't have the proper glue. We also facebook stalked her so that we can print out these wonderful pictures of the happy couple.
You can see the purple string on the top corner, that was our main string that we used so that she can hang the poster to her wall, or anything that she wants to.

After we wrote with the glitter glue, we made sure we gave it at least 1 day to dry! We wanted to make sure that it was fully dried before we used a purple pen to define the letters.

This is our wonderful square charm that we cut from 0-9. This worked so great with a simple fabric string that we can puncture with the colored tab to the foam. We did these numbers so that she can keep herself organized and to know how many days she has left because weddings can be so time consuming and its easy to get caught up with 1 project when there is a whole wedding to plan. Our cousin works full time & goes to school part time, so organization is a MUST! The numbers are easy to handle and change and to pin on and off . . . all of the above!
We hope that you like this and hope that you are inspired to make something great for someone. Check out our Etsy Store to see if there is anything that you can use for your next project! Or if there is anything that you see here and our past post! We can definitely help to make something great happen!
Sunday, March 4, 2012
Burlap Banner
Look at how one of our recent customer used the Western Alphabet! This is a super cute burlap banner that she made for a friend's baby shower.


Photo courtesy of: jamiemellis from etsy.com
Sunday, February 19, 2012
Simple Thank You Tags
Hey all,
As you know, I (Baby Sister) is a big supporter of an organization called Poly North. Last week they had their first annual Love Run to try to get folks to come out and run for a great cause. All proceeds went to directly to Poly North.
Both of us picked up on a couponing habit and noticed that there were awesome coupons for valentine day candy, so what I did was bought enough to fill a bowl or so and runners can get one after they finished the run, I also created a very simple tag for the candy. Here is what the tag looked like:


I kept the tags very simple, I just used a standard rectangle with a simple thank you note. I slit some lines so that I can put a ribbon through to tape. I didn't want to tie because if I tied the tags, it can slip off easily, and if I tied too tight, I can ruin the candy. Tape seems to do the trick wonderfully.
Please visit us at our Etsy Store to see if there is anything that we can do for you! Check it often because we have plenty of things that we are creating constantly!
As you know, I (Baby Sister) is a big supporter of an organization called Poly North. Last week they had their first annual Love Run to try to get folks to come out and run for a great cause. All proceeds went to directly to Poly North.
Both of us picked up on a couponing habit and noticed that there were awesome coupons for valentine day candy, so what I did was bought enough to fill a bowl or so and runners can get one after they finished the run, I also created a very simple tag for the candy. Here is what the tag looked like:


I kept the tags very simple, I just used a standard rectangle with a simple thank you note. I slit some lines so that I can put a ribbon through to tape. I didn't want to tie because if I tied the tags, it can slip off easily, and if I tied too tight, I can ruin the candy. Tape seems to do the trick wonderfully.
Please visit us at our Etsy Store to see if there is anything that we can do for you! Check it often because we have plenty of things that we are creating constantly!
Tuesday, February 14, 2012
DIY Valentine's Day Cards
Happy Love Day to everyone!!
We all hope that your Valentines day went well, and that you were showered in love from everyone that you hold near & dear. I (Baby Sister) don't like the whole term S.A.D (Singles Awareness Day) for today because love is all around us, and everyone says that there shouldn't be a day where you have to show your love to someone . . .but the way that I see is that today just allows you to enhance the love that you have for those around you . . . significant other, family, or friends . . . everyone loves to feel appreciated!
With that said, our aunt recently asked us if we can make her some valentines day card so that she can pass out. Of course we said yes! Here's what they looked like:


We all hope that your Valentines day went well, and that you were showered in love from everyone that you hold near & dear. I (Baby Sister) don't like the whole term S.A.D (Singles Awareness Day) for today because love is all around us, and everyone says that there shouldn't be a day where you have to show your love to someone . . .but the way that I see is that today just allows you to enhance the love that you have for those around you . . . significant other, family, or friends . . . everyone loves to feel appreciated!
With that said, our aunt recently asked us if we can make her some valentines day card so that she can pass out. Of course we said yes! Here's what they looked like:

There is the set of 3 cards that we made

Cupid with LOVEx3 . . . extra love for this person

True love, because lets face it . . . on Valentines day . . . all love is true because it is enhanced with gifts, no matter how big or small.

Traditional heart & Valentines Day Card

Inside of the card, a neutral message: Love is . . . Being able to spread love all year round . . . Happy Valentine's Day. All the cards have the same message.
Hope you like them! Check out our Etsy Store to see if there is anything that you can use to personalized your own card & to keep checking on what new things we have in store!
Saturday, February 11, 2012
Baby Shower Invites
So things have been crazy! We made the cute baby animals for our cousin. We didn't want to share the invites to the world because the baby shower was suppose to be a surprise to our cousin who is expecting her first baby boy in March . . . BUT!! Baby boy Caleb came early! and she knows now about the baby shower.
So here is what they look like! We were having a jungle theme party for the baby shower:
 We printed the invites and made the embellishments to help the invitation pop! We didn't want to go overboard on the "jungle." So we made the monkey hanging on the vine, a happy giraffe and the zebra hiding in the grass!
Tell us what you think!!
Visit our Etsy store to see if there is anything that we can help on your next project!
So here is what they look like! We were having a jungle theme party for the baby shower:

Tell us what you think!!
Visit our Etsy store to see if there is anything that we can help on your next project!
Subscribe to:
Posts (Atom)